Six weeks, one boot and a crutch equals a loss of symmetry and balance in my body. I was hanging from my pull-up bar this morning, grateful to have the opportunity to let most of my joints literally hang-out for several minutes. Just to recap: As of writing this blog, I am 6 weeks post-op from bunionectomy and hammer-toe repair surgery on my left foot; 6 weeks tottering around in a recovery boot with a single crutch. My body promptly rebelled.
It’s virtually impossible to maintain optimal alignment and posture with a boot and crutch. The boot elevates my left hip when I am barefoot on the right side. It’s difficult to find an appropriate shoe to match its height and be safe in moving about, especially on stairs and uneven surfaces. Distribution and transfer of weight in standing and movement are sorely compromised. So, in addition to adhering to strict medical guidelines to rehab my surgery foot, I am being proactive in caring for my right side-body which is being challenged and moving in peculiar ways.
My imbalance derived from using a crutch on my right side manifests in right lumbar (low back) pain, serious fatigue on my right side coxal (hip) joint, and dull ache in my right sacroiliac (SI) joint. Here is how I currently find symmetry on three legs!
Static Back Press
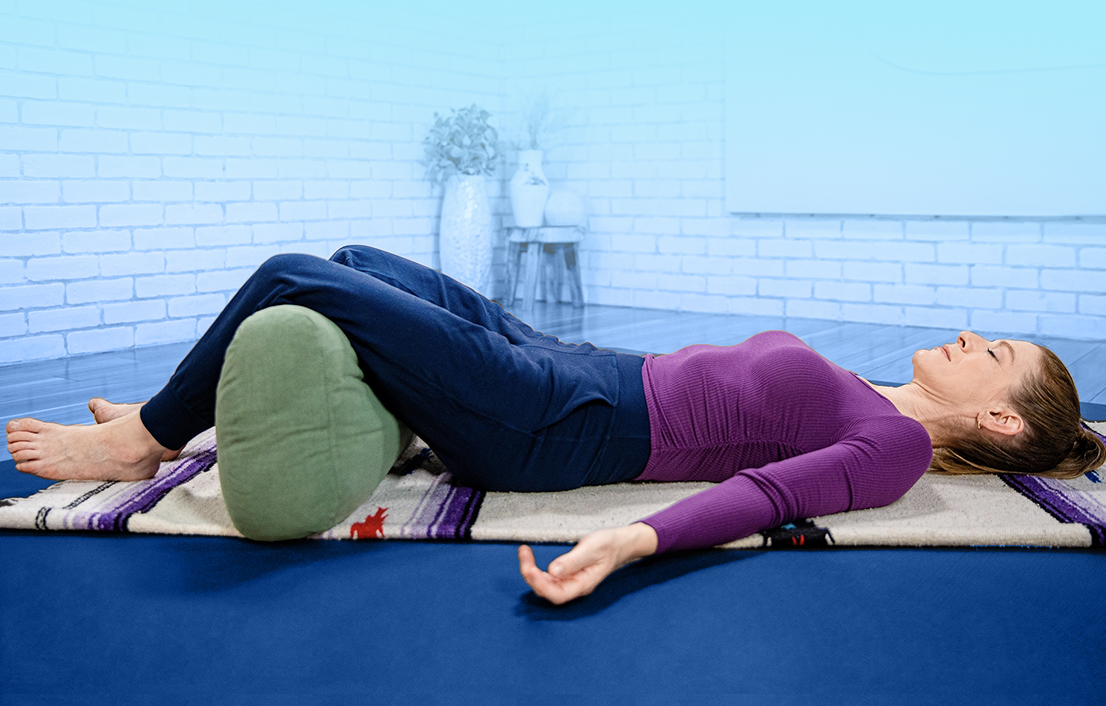
I begin with the Static Back Press from The Egoscue Method (pg 117-118). The main purpose of the static back is to relax the upper torso with the help of gravity. In doing so, the lumbar spine and pelvic bones will settle evenly into the floor. I tap into my deep, diaphragmatic breathing to elicit relaxation and consciously bring awareness to relieving the dull ache in my SI joint.
How: Lie on floor with both legs up at right angles on a block, chair, or bench. Your heels, calves and lower legs up to the posterior of the knee joints, should rest on the surface of the block. Let your back settle into the floor allowing the postural muscles to relax. This may take several to over thirty minutes! This is the “silver bullet” of The Egoscue Method for back pain-suppression.
I then move into Yoga Tune Up® and Roll Model movements. I mix it up each day depending on my body’s needs.
Revolved Abdominal Pose
This feels so good following the alignment achieved with Egoscue’s Static Back Press. To maintain optimal alignment, keep knees stacked as you rotate side to side.
Happy Baby Minivini
Calling on the multiple ligaments and muscle tendons connecting the head of the femur (thigh bone) into the acetabulum, the rounded socket of pelvic/hip bone, this YTU movement pattern is an exceptional way to warm the synovial fluid, a viscous substance that lubricates and circulates nutrients to the joint. Totally yummy sense of space and mobility in my hip after several passes!
Quadratus Lumborum (QL) Lovin’
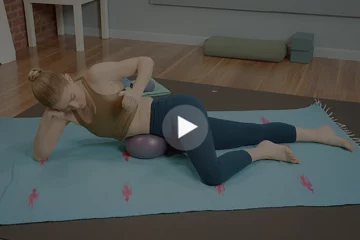
Place toted (easier to manage!) Therapy Balls horizontally across your low back, on either side of your spine. With knees bent, feet on floor and forearm support, roll the balls up and down your low back for several minutes warming the tissues. Then, recline, un-tote balls and place just above pelvic crest, again, on either side of spine. Draw one knee at a time to your chest (same side hand to knee) and allow body weight and gravity to gently but firmly drive balls into the deeper QL muscle which extends from the posterior iliac (pelvic) crest to last rib and transverse processes of the first through fourth lumbar vertebrae. Using arm strength, lower your feet back toward floor allowing buttocks to tap floor. Then pull knees back to chest, and repeat. Passively roll the low back over the balls, repeatedly stripping the QL.
Join me Friday as we continue to work through the sequence that kept me kicking symmetrical butt on all three legs!





My mom will be having knee replacement surgery next month. These exercises from egorecue, including static back press, might ve helpful for her, especially when she us mor only dealing with knee healing, but the loads and imbalances involved in crutch, walker or cane walking.
I never know about the Egoscue’s Static Back Press, I’m quite sure I’ve done this before, I think many people actually do without even realizing the benefit especially as a child, laying on the floor by the couch with your feet resting on cushions. The amazing things we do without knowing or realizing the benefit it may have. Moving the synovial fluid is very important especially for joint health so Happy Baby Minivini will be a new goto for me.
Three wonderful ways to stay active while staying off the feet to recover from foot or leg injury or surgery. I am not familiar with Egoscue Method. I look forward to doing a little research. Can’t wait to user revolved abdominal pose minivini half happy baby and QL lovin’.
Great information. Thank you!
Thank you for sharing your post surgery recovery tips and tools. As someone who has knee issues and has spent so much time on crutches over the years, I can relate to misaligned body parts after living with three legs. I’ll keep this article bookmarked and use it to avoid further problems down the road.
Thanks for sharing the specifics of how healing one injury was causing harm in other parts of your body. The second exercise on the YTU balls sounds really yummy and I wish there were a video. You instructed to pull one knee at a time in, but then is sounds like both knees come in after that. Is this a progression? Or am I misunderstanding the movement?
I am currently dealing with a minor knee injury and I feel the imbalance starting just a few days after limping around so I can only imagine what 6 weeks can do. I will try to utilize these exercise to help maintain balance and really appreciate the insightful post!
Thank you for sharing your journey. I have a few clients that have gone through this and I appreciate your recommendations to work with them. Anyone that has to be on crutches can benefit from this.
You are the perfect example of self-care !! Thank you for taking the time to explore these postures that help you release and heal, and thank you for taking time to write about it. As I mentioned in my comment in your other article, I am considering bunionectomy, and it comforts me to know that there are tools! 🙂
Thank you for sharing your journey, Lisa. All of the information and videos have validity and a place in our lives. I look forward to more from you!
This article was so helpful Lisa! I have a client who has a very bad bunion on her right foot and has not had surgery yet. I have been working with her using the toe corrector (Pilates)and it is helping for sure . My guess is that the toe will never completely be in correct alignment again but she does feel better. She also has scoliosis in her right lumber spine which is concave and we have been using the YTU balls in the QL region. Overall she is in a lot less discomfort. I am always looking for more to help her with so I look forward to hearing more about your recovery journey. Thank you for sharing!